이번에 node.js로 파일 업로드와 다운로드 모듈을 개발했다.
맨날 스프링으로만 개발했었는데 node.js로 개발하는건 처음이라 정리해놓고자 한다.
기존에 스프링으로 구현해놓은 메인? 백엔드는 존재하는 상태였고,
이번에 파일 업로드/다운로드 기능이 새로 추가되면서 별도의 node.js 모듈로 구현했다.
이유는,, 아무래도 올리게되는 파일의 형태가 영상, 사진 등의 형태여서 파일 업로드시 부하가 가기 마련인데,
기존 와스에 최대한 영향을 덜 주고, node.js 서버에만 부하를 주기 위함이였다.
결론
multer는 파일을 전송단계에서 저장하고 전송하게 된다.
나는 저장 없이 바로 스트림으로 목적지까지 업로드해야했기 때문에 connect-busboy를 사용했다.

multer와 connect-busboy로 시도한 방법
multer
인터넷에 검색하면 가장 많이 나오는건 multer 모듈이다.
레퍼런스도 많고 좋은 모듈이지만 multer는 파일을 전송단계에서 프로젝트 내부에 파일을 저장하고 전송하게 된다.
이게 무슨말이냐면,
var express = require("express");
var app = express();
var fs = require("fs");
app.use(express.json());
app.use(express.urlencoded({ extended: false }));

var multer = require("multer"); // multer 모듈 적용하기
var _storage = multer.diskStorage({
  // {}안에 있는건 객체를 표현한다. destination과 filename. 둘다 함수다.
  destination: function (req, file, cb) {
    // 사용자가 전송한 파일을 어느 디렉토리에 저장할 것인가
    cb(null, "uploads/");
  },
  filename: function (req, file, cb) {
    // 사용자가 전송한 파일의 이름을 어떻게 할 것인가
    cb(null, file.originalname);
  },
});
...
뭐 이렇게 multer로 작성하게 되면,
저 destination이라는 함수에 파일을 저장할 위치를 작성하게 되는데
uploads/ 안에 파일을 저장하겠다. 라고 선언해 놓았다면

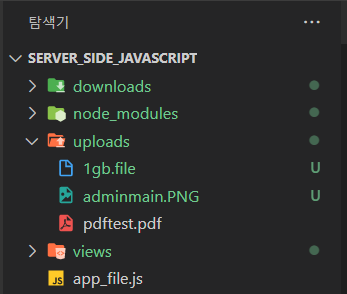
① 프로젝트 홈 경로에 uploads 디렉토리가 생성되며 이 안에,
...
app.post("/upload", function (req, res) {
  upload(req, res, function (err) {
      var localFileStream = fs.createReadStream(__dirname + "/" + req.file.path);
      var remoteFileStream = hdfs.createWriteStream("/platform/" + req.file.filename);

      localFileStream.pipe(remoteFileStream);
    }
  });
});
...
② 이렇게 createReadStram으로 스트림 생성할때 작성해놓은 이름으로 파일이 저장되고(__dirname이 uploads)
③ 그 파일이 pipe되어서 createWriteStream으로 정의해놓은 곳으로 파일이 업로드된다.
근데 이렇게 할 경에는 업로드하는 모든 파일이 node.js 서버안에 또 저장되기 때문에 나는 바로 스트림으로 파일을 전송하고 싶었다.
connect-busboy
connect-busboy는 중간 저장 없이 바로 스트림으로 업로드시키는 모듈이다.
var WebHDFS = require("webhdfs");
var hdfs = WebHDFS.createClient();

var express = require("express");
var app = express();

const busboy = require("connect-busboy");
app.use(busboy());

// 객체 생성
var hdfs = WebHDFS.createClient({
  user: "hdfs",
  host: "192.168.xxx.xxx",
  port: 50070,
  path: "/webhdfs/v1",
});

// upload 액션 처리
app.post("/upload", function (req, res) {
  var fstream;
  req.pipe(req.busboy);

  req.busboy.on("file", function (filedname, file, filename) {
    var finename = filename.filename;

    // stream으로 보내기
    fstream = hdfs.createWriteStream("/platform/" + finename);
    file.pipe(fstream).on("finish", () => {
      console.log("stream finished : " + finename);
    });
  });
});
(위 코드는 hdfs로 파일을 업로드하는 코드. hdfs는 fs로 봐도 무방)
multer와는 달리 받아온 스트림 자체를 전송할 fs객체의 createWriteStream으로 바로 전송한다.
참고 : 아래는 다운로드 코드이다.
// download 액션 처리
app.post("/download", function (req, res, next) {
  var filename = encodeURI(req.body.fileNm);
  var fileorig = encodeURI(req.body.fileOrig);
  console.log("download file filename : " + filename);
  // 브라우저 팝업으로 download할 위치 선택
  res.setHeader("Content-disposition", "attachment; filename=" + fileorig);
  // 받아온 결과를 stream으로 전송
  hdfs
    .createReadStream("/platform/" + filename)
    .on("error", (err) => {
      console.error("download error : " + err);
    })
    .pipe(res)
    .on("finish", () => {
      console.log("download finish : " + filename);
    })
    .on("error", (err) => {
      console.log("download error : " + err);
    });
});
참고 사이트
https://bytearcher.com/articles/formidable-vs-busboy-vs-multer-vs-multiparty/
Choose between Formidable, Busboy, Multer and Multiparty for processing file uploads
NAVIGATION Breakdown of most popular packages Use Formidable or Multer for proof of concepts and low volume Use Busboy for high-volume production-grade solution Visual guide There are a few npm packag
bytearcher.com
'Web 개발' 카테고리의 다른 글
| Spring 프로젝트 내 jsp에서 node.js 서버 호출하기 (0) | 2023.02.23 |
|---|---|
| 오프라인 환경(폐쇄망)에 node랑 yarn 설치하기 (4) | 2022.12.09 |
| 크롬에서 캐시 비우기 및 강력 새로고침 (2) | 2022.12.08 |
| 이중화 되어있는 웹서버로 ajax 호출하기 (0) | 2022.12.08 |
| 오프라인 환경(폐쇄망)에서 npm 패키지 install 하기(yarn offline) (1) | 2022.12.06 |
